

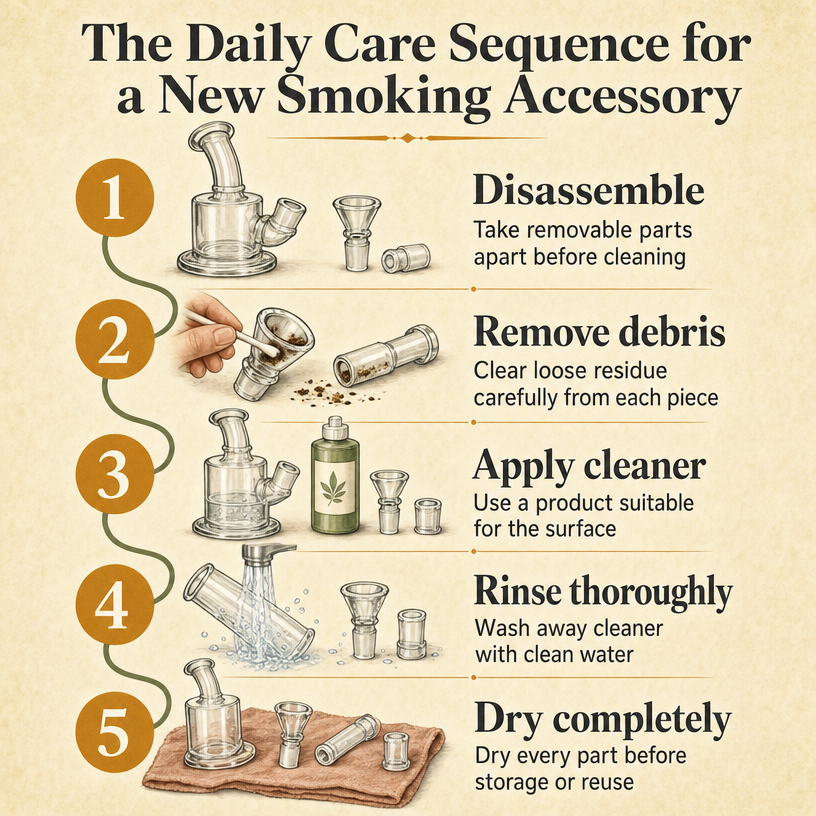
A reliable smoking accessory care routine starts when the accessory arrives, not after the first sign of buildup. Unpack it on a soft surface, check every part for damage, follow the maker’s material instructions, clean the surfaces with a suitable product, rinse well, and let everything dry fully before storage or reuse. GRAV’s guidance also puts disassembly, careful debris removal, cleaning solution, and thorough rinsing in that order for glass pieces. [1]
The goal is simple: make inspection, cleaning, drying, and storage repeatable. This guide explains how to care for glass pieces and other accessories without guessing at products or using a one-size-fits-all method. The CDC recommends choosing a product appropriate for the surface and following its label, while its definitions help you tell ordinary cleaning apart from sanitizing or disinfecting. [2] A useful routine also protects your time: it breaks a large cleanup into small actions that are easy to repeat. Keep the steps visible near your storage area if that helps everyone in the home remember them. When the routine is clear, you can spend less effort deciding what to do and more effort noticing the condition of the piece.
What Should You Do the First Time You Unbox a New Smoking Accessory?
Use unboxing as the first maintenance check. Begin by opening the package over a table, counter, or towel where a small part cannot roll away and a glass piece is less likely to hit a hard edge. Keep the receipt, care card, and warranty information in one place; those documents may answer material or heat questions later and become the reference you check first whenever the routine needs a refresh.
Before cleaning, compare the contents with the product description. A complete set is easier to inspect and easier to maintain than a pile of parts whose purpose is unclear. If the maker includes special directions, those directions take priority over general tips on the internet. Write down questions before you begin, especially if the accessory combines glass with metal, plastic, rubber, wood, or an electronic component. Different materials may need different handling, and guessing at a shared cleaner is how a simple first clean turns into an expensive lesson.
For the first clean, separate removable parts only when the design allows it. Remove loose packing dust or debris carefully, use a cleaner that matches the surface, rinse thoroughly, and dry every part. Manufacturer guidance for glass follows this same basic pattern, but products and terms can vary by material and design. [1] Check the work area before you finish: a tiny seal left under a towel or a fitting placed in the wrong position can make the next setup frustrating. Put each dry component back with its matching piece, and do not force a connection that does not seat naturally.
- Unpack on a soft, stable surface and keep small parts together.
- Save the instructions, receipt, and warranty details.
- Confirm that every expected part is present.
- Inspect rims, joints, seals, and the main body before cleaning.
- Complete the first clean, rinse, and dry before storage or reuse.
- Keep the piece in a padded location where it cannot tip or collide with other items.
How Do You Inspect Glass and Other Smoking Accessories for Damage?
Glass can look fine at a quick glance while a chip at a rim, a hairline crack, or a rough joint becomes obvious under strong light. Inspect before the first use and again after cleaning, moving, or storing the accessory. Add one more check whenever a part feels different, fits poorly, or makes an unexpected sound. A few quiet seconds here are better than discovering a problem while handling the piece in a hurry.
DWK Life Sciences recommends checking glassware for chips, cracks, scratches, bubbles, and other surface marks. Its safety guidance also warns that damaged glass should be removed from service and handled or disposed of carefully. [4] Do not try to polish away a structural concern or keep a suspect piece in rotation because the damage seems small.
Use a slow, consistent walkthrough rather than relying on memory. The same order helps you notice changes over time, especially around thin edges and connections. If you find a problem, isolate the item, avoid handling the damaged area unnecessarily, and contact the manufacturer or retailer for the right next step. Take a quick note of what you saw and where it appeared; that makes a support request clearer and helps you compare the item after transport or storage.
- Choose bright, even lighting and turn the piece slowly.
- Look closely at rims, corners, joints, seals, and thin sections.
- Check the body for chips, cracks, scratches, bubbles, or unusual marks.
- Run a clean fingertip carefully along accessible edges to notice rough spots.
- Check that removable fittings are secure without forcing them.
- Remove anything suspicious from use and ask the maker how to handle it.
What Is the Step-by-Step Routine for Cleaning Glass Pieces and Other Smoking Accessories?
Start with the material and the manufacturer’s instructions, then work gently and give each part enough time to rinse and dry. The sequence below is a practical framework for glass and similar accessories; change it when the product instructions require a different method. Before you begin, clear enough counter space for every part. Crowding encourages drops, misplaced seals, and rushed decisions, while a simple towel gives clean parts a defined landing place.
The CDC says cleaning generally means removing dirt and impurities with soap or detergent and water, and it advises using a product suited to the surface while following the label. [2] That makes the label part of the routine, not an afterthought.
Avoid improvising with heat, harsh abrasion, or sudden temperature changes. Glassware safety guidance notes that uneven or incorrect heating can stress glass and contribute to failure, so follow the maker’s directions for any heat exposure. [4]
- 1. Read the accessory and cleaner instructions before taking anything apart.
- 2. Disassemble removable parts only as directed; keep seals and small pieces together.
- 3. Remove loose debris carefully so it does not scratch or lodge in a joint.
- 4. Apply a cleaner appropriate for the exact surface and use the label’s directions.
- 5. Agitate gently with a compatible tool rather than forcing a brush into a narrow opening.
- 6. Rinse every part thoroughly with clean water so cleaner is not left behind.
- 7. Dry completely, including joints and cavities, before reassembling or storing.
- 8. Inspect once more and record any part that needs replacement or manufacturer help.
Which Cleaning Products and Labels Are Safe for Smoking Accessories?
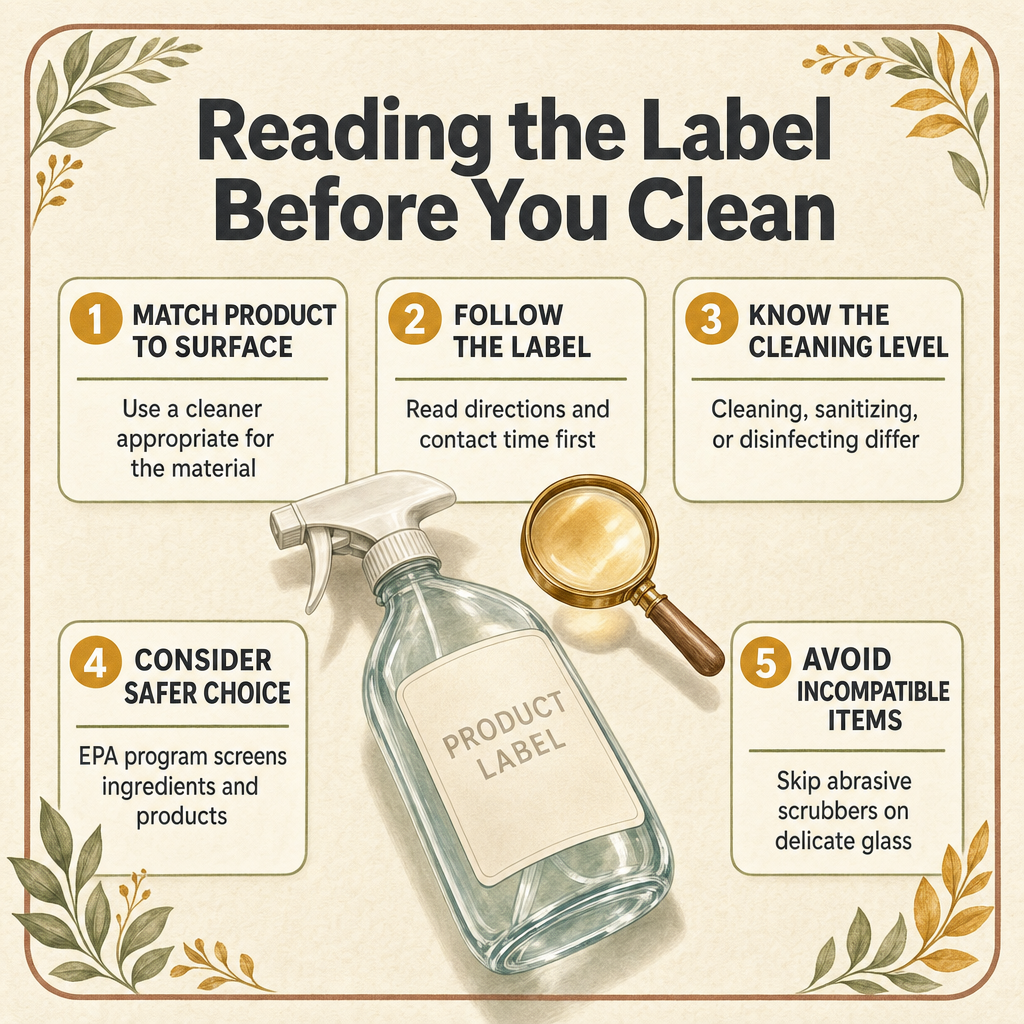
There is no universal cleaner that belongs on every accessory. Match the product to the material, finish, seals, and removable components. A label that works for one surface can be a poor fit for another, so read both the accessory instructions and the cleaner directions before applying anything. If you cannot confirm compatibility, pause and ask the manufacturer; guessing is not a care plan. Keep the product container nearby until the job is finished so you can check directions instead of relying on memory.
The CDC separates cleaning, sanitizing, and disinfecting, and recommends following the product label for the surface and the required use. [2] For most routine maintenance, begin by asking what level of cleaning the manufacturer describes rather than automatically reaching for the strongest-sounding product.
EPA Safer Choice can help shoppers identify products whose ingredients and performance are reviewed through that program, but the label does not replace a material-compatibility check. [3] Keep ventilation, contact time, rinsing, and storage directions in view, and never mix products unless the labels explicitly permit it.
- Soap or detergent with water: consider it when the manufacturer permits it and the surface can be rinsed fully.
- Specialty accessory cleaner: follow its exact directions, including dilution, contact time, and rinsing.
- EPA Safer Choice products: use the program as a screening aid, then confirm compatibility with the accessory.
- Abrasive powders, rough pads, and rigid tools: avoid them when they could scratch or stress the surface.
- Products with incompatible-surface warnings: keep them away from that accessory, regardless of their general purpose.
- Any cleaner: store it in its original container and follow the label’s handling instructions.
| Label question | Why it matters |
|---|---|
| Is it suitable for this material? | The cleaner must match the surface and its components. |
| What is the required contact time? | The label tells you how long the product should remain in place. |
| How should it be rinsed or removed? | Thorough removal prevents cleaner from remaining on the accessory. |
| Does the product carry a relevant warning? | Warnings help you avoid incompatible surfaces and handling mistakes. |
How Often Should You Clean Smoking Accessories Between Uses?
Use visible condition and the manufacturer’s advice to set your cadence. A person who uses one accessory often will need a different routine from someone who uses it occasionally. Fixed day counts can sound neat but are less useful than a clear set of triggers.
A quick rinse and complete dry after each use can reduce the amount of work in the next full clean when the product instructions allow that step. Schedule a fuller routine clean regularly, and move it sooner when you see film, residue, or an odor that does not belong. The CDC’s surface-cleaning principles still apply: use an appropriate product and follow its label. [2]
Keep the routine small enough that you will actually do it. Clean one part at a time, place parts on a fresh towel, and do not reassemble until every section is dry. If the piece is shared, ask the manufacturer for any additional care guidance instead of inventing a stronger treatment. It can help to keep a short care card with the accessory: write down the material, the approved cleaner, the parts that come off, and the storage location. That tiny record saves time when several accessories have different instructions. Add the date of a full clean if you want a simple record, but let visible condition and the maker’s guidance—not an arbitrary calendar—decide when the next one is needed. A consistent routine is not glamorous, but neither is hunting for a missing seal at midnight.
- After each use: follow the maker’s advice for a quick rinse, then dry fully.
- On a regular schedule: perform the complete disassemble, clean, rinse, and dry routine.
- When visible film appears: clean sooner rather than waiting for the next scheduled session.
- When residue or odor remains: check the cleaner instructions and repeat only as directed.
- After travel or a drop: inspect the accessory before returning it to service.
- Whenever instructions change: use the current manufacturer guidance as the baseline.
How Should You Store Smoking Accessories So They Stay Clean and Ready?
Storage is the final step of cleaning, not a separate chore. A clean accessory can pick up dust, collide with another piece, or develop a problem if it is put away while damp. Choose a spot that is stable, padded, and easy to inspect.
Glass also deserves protection from sudden temperature changes. DWK’s glassware guidance advises avoiding abrupt heating or cooling and checking for damage before use. [4] Let the piece return to a normal temperature before moving it into storage, and follow any product-specific heat instructions.
Keep parts organized without forcing them together. If a seal, joint, or small fitting looks worn, note it before the next session and replace it according to the maker’s instructions. A storage routine also works best when it is easy to reset: return each part to the same place, wipe the shelf or case when needed, and keep the inspection light nearby. These small habits make missing parts and new damage easier to spot. If children, pets, or visitors can reach the storage area, choose a location that prevents accidental knocks and keeps cleaning products separate from the accessory.
- 1. Dry every part completely before putting it away.
- 2. Separate pieces that could touch, rub, or press against one another.
- 3. Use a padded case, shelf, or container that keeps the accessory upright and stable.
- 4. Keep the storage spot away from abrupt temperature swings and unnecessary heat.
- 5. Store small parts together but do not force seals or fittings into place.
- 6. Re-inspect rims, joints, and the body before the next use.
Frequently Asked Questions
What should I do before using a new smoking accessory for the first time?
Unpack on a soft surface, save the paperwork, confirm every part is present, and inspect for chips, cracks, scratches, or bubbles. Then follow the maker’s instructions for disassembly, cleaning, rinsing, and complete drying.
How often should I clean glass pieces and other smoking accessories?
Follow the manufacturer’s guidance, rinse and dry after use when the design permits it, and perform a full routine clean regularly. Clean sooner when visible film, residue, or an unusual odor appears.
What is a practical step-by-step routine for cleaning and drying glass?
Disassemble removable parts, remove loose debris, apply a suitable cleaner, agitate gently, rinse thoroughly, and dry every part completely before reassembly or storage.
How should I inspect an accessory for chips, cracks, or other damage?
Use good lighting, inspect rims, joints, seals, and the body slowly, and feel accessible edges carefully for rough spots. Remove any suspect piece from use and ask the maker about handling or replacement.
Which cleaning-product label and handling instructions should I follow?
Choose a product appropriate for the material, read its directions and contact time, and follow its handling and rinsing instructions. EPA Safer Choice may help screen products, but compatibility with the accessory still must be checked.
Can heat or sudden temperature changes damage a new glass accessory?
Yes. Avoid abrupt heating or cooling and follow the manufacturer’s instructions for any heat exposure because uneven or incorrect heating can stress glass and contribute to failure.
What Is the Simple Care Routine to Keep Using?
Keep the routine steady: inspect before use, follow the material-specific instructions, disassemble removable parts carefully, remove loose debris, clean with a suitable product, rinse thoroughly, and dry completely. Store the accessory in a padded, stable place and avoid abrupt temperature changes.
The best routine is the one that prevents guesswork. When a piece shows a chip, crack, scratch, bubble, or other concern, take it out of service rather than trying to make it last one more time.
A reliable routine also travels with the piece. When a new accessory moves between homes or bags, run through the same inspection and cleaning steps before it goes back into regular use, and keep the manufacturer card where you can find it again. Repeating these habits turns a one-time setup into a long-term maintenance plan that protects the time and money you put into each piece.
Sources
- GRAV: How Clean Your Bongs & Pipes
- Centers for Disease Control and Prevention: When and How to Clean and Disinfect Your Home
- U.S. Environmental Protection Agency: Safer Choice
- DWK Life Sciences: Inspecting Laboratory Glassware for Damage