
Clean your tank glass and threaded base with warm water at least once a week, deep-clean every part with 91% or higher isopropyl alcohol every one to two weeks, replace the coil every one to three weeks, and prime every new coil before the first puff. These four habits cover most of the work that keeps a refillable vape tank tasting clean and the device performing the way it did out of the box.
The two variables that fall outside this core routine are the e-liquid you choose and how the device is stored between sessions. High-VG liquids and heavily sweetened flavors leave residue on the coil faster than thinner liquids do, and how the tank is stored between uses affects whether seals stay tight. Get those two supporting habits right and the weekly routine does most of the rest.
What Are the Parts of a Refillable Vape Tank and Which Ones Affect Flavor?
A refillable vape tank is a small modular unit that screws onto a battery mod or 510-threaded battery. The same hardware goes by several names across brands, and the same hardware piece may be called a tank, clearomizer, pod, or chamber depending on the device style [1]. Knowing the parts by their function makes the whole maintenance routine easier, because once you know which part does what, you know which part to clean or replace when flavor slips. Devices like the Puffco Pivot Concentrate Vaporizer – 750mAh / Sapphire show how the same coil-and-tank layout shows up across refillable vape pens and concentrate hardware.
The atomizer coil is the heating element. It warms the e-liquid into vapor and is the single largest driver of flavor day to day. The coil sits next to a wicking material, usually organic cotton, that draws liquid up to the heating wire by capillary action. When the wick is fresh and the coil is clean, flavor is sharp and consistent. As residue builds on the wick, flavor dulls, and once the wick is darkened or dried out, flavor goes burnt.
The tank or chamber is the reservoir that holds the e-liquid. On most refillable devices it is a glass or plastic tube sealed against a metal base with rubber or silicone o-rings. The threaded base holds the coil and connects the tank to the battery. The mouthpiece, also called a drip tip, is where vapor leaves the device. Airflow vents on the base or side of the tank control how much air mixes with the vapor as it travels from coil to mouthpiece, which shapes both draw resistance and perceived flavor.
A clean tank and a clean mouthpiece help flavor, but the coil and wick are what most directly decide whether the device tastes the way the e-liquid was meant to taste. That is why the routine below focuses on coil replacement first and tank cleaning second.
- Atomizer coil: the heating element that turns liquid into vapor and most directly drives day-to-day flavor.
- Wicking material: cotton or similar that draws liquid up to the coil; must stay saturated or flavor turns burnt.
- Tank or chamber: glass, plastic, or metal reservoir that holds the e-liquid between fills.
- Threaded base and o-rings: the metal base and rubber seals that lock the tank together and seal against the mod.
- Mouthpiece or drip tip: the part lips touch, where vapor exits the device.
- Battery mod: the power source that fires the coil and the only part that should never get wet during cleaning.
How Often Should You Clean a Vape Tank to Keep Flavor Clean?
Cleaning cadence should match how heavily the device is used. A short routine done on time beats an occasional thorough clean, because residue that sits on the tank for weeks is much harder to shift than residue wiped off every few days. Most manufacturers lay out a four-tier cadence that scales with use [3].
A quick wipe-down of the mouthpiece and exterior after every session keeps e-liquid from drying on the outside and stops dust from being drawn into the airflow. A weekly warm-water rinse of the glass, threaded base, and mouthpiece is enough for a light user who refills a tank once a day. A deeper isopropyl soak every one to two weeks keeps the threaded base and mouthpiece free of the oily film that warm water alone will not remove. For someone who vapes heavily through the day, the same deep clean belongs on the schedule twice a week rather than once.
If only one habit fits the schedule, the weekly warm-water rinse is the one to keep. It is fast, it costs nothing, and it removes the bulk of the residue that dulls flavor over time. Pair that with a fresh coil every one to three weeks and most tanks will stay near factory flavor for the life of the device.
For a broader look at how cleaning cadence compares across smoking and vaping gear, this How Often Should You Clean Your Smoking Gear? walks through the same idea for pipes, bongs, and other accessories and lines up a similar light, medium, and heavy-use schedule.
- After every session: wipe down the mouthpiece and exterior with a dry paper towel.
- Weekly (light user): warm-water rinse of the glass, threaded base, and mouthpiece.
- Every one to two weeks (light user): full isopropyl deep clean of disassembled parts.
- Twice a week (heavy user): full isopropyl deep clean to keep up with residue from constant use.
- Replace the coil every one to three weeks regardless of how clean the tank is.
What Is the Safest Way to Clean a Vape Tank and Coil at Home?
The home routine that works for most refillable tanks uses plain warm water for routine rinses and 91% or higher isopropyl alcohol for the deeper clean. Both are widely recommended by manufacturers, and both work best when the tank is fully disassembled first [2].
Plain warm water is the standard tank rinse for tanks cleaned within a week or two and is enough on its own for a light user. For a deeper clean, propylene glycol, baking soda, vinegar, or ethanol can be added, but every agent has to be rinsed thoroughly with warm water before the tank goes back into service. Whichever agent you pick, the steps below keep the parts safe and the next fill tasting like the e-liquid and not the cleaner.
Isopropyl alcohol at 91% or higher is the most popular deep-clean agent because it dissolves oily residue and evaporates quickly. The standard procedure is a 30 to 60 minute soak, a thorough warm-water rinse, and a full air dry before reassembly. The battery, the mod, and any electronic component should never be submerged, and ISO residue should never go back into the tank with the parts.
Once everything is clean and dry, prime a fresh coil before the first hit and let the tank sit for three to five minutes after filling so the wick saturates fully. That single habit is the most common reason a brand-new coil instantly tastes burnt, and it is the easiest habit to add to the end of any clean.
If you want a longer-term look at how a vape maintenance routine fits alongside the rest of your setup, this How Do I Maintain My Vaporizer for Best Performance? walks through the same cleaning steps in more detail and covers a longer-term parts-replacement schedule.
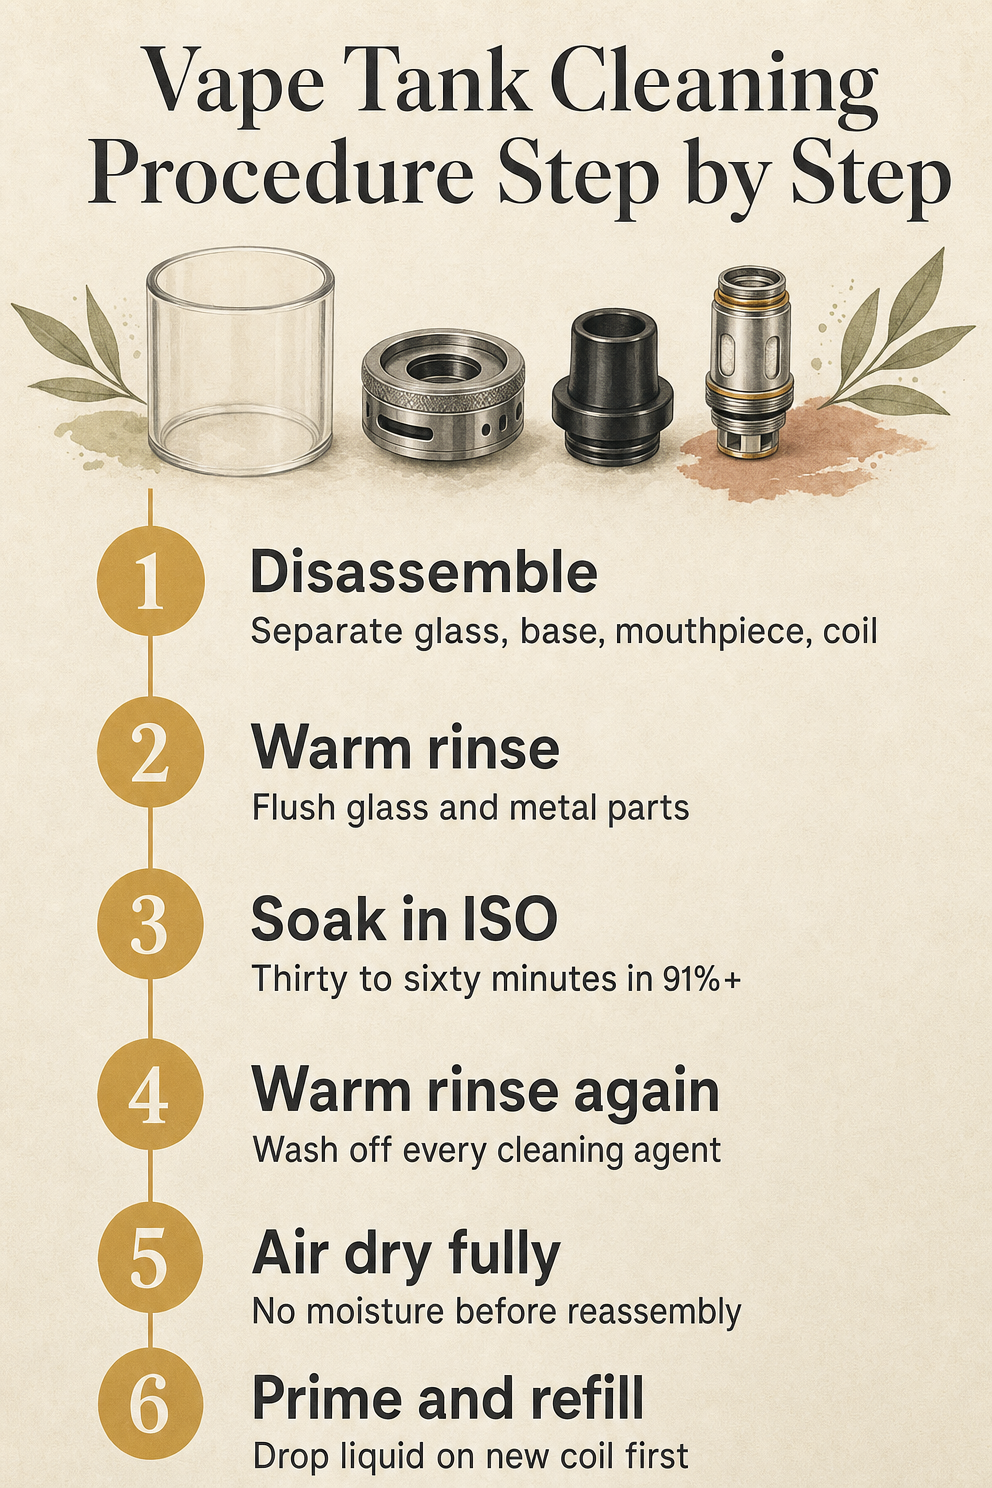
- Disassemble the tank fully: separate the glass, threaded base, mouthpiece, and coil. Do not wash the mod or battery.
- Rinse glass and metal parts under warm running water to flush loose e-liquid and surface residue.
- Soak glass, base, and mouthpiece in 91% or higher isopropyl alcohol for 30 to 60 minutes.
- Rinse every part a second time under warm water to wash off every trace of cleaning agent.
- Air dry every part fully on a paper towel. Do not reassemble any part that still feels damp.
- Prime a fresh coil with a few drops on the wick, install the coil, fill the tank, and wait three to five minutes before firing.
How Long Does a Vape Coil Last Before It Needs Replacing?
A coil is a consumable part. Most coils last one to three weeks with regular use, and no cleaning routine turns a used coil back into a fresh one [3]. The honest expectation is that every refillable tank goes through several coils a year, and the maintenance routine is mostly about getting each coil to last its full life rather than stretching any single coil past its end.
Four reliable end-of-life signals tell you when a coil has run its course. A burnt or acrid taste on every puff, gurgling or popping sounds during firing, a noticeable drop in vapor output, and visible dark residue on the wick are the standard signs. Once any of these show up, replacement is the reliable fix. Deep cleaning rarely restores a coil to factory flavor once the wick is darkened, and pushing past the signal usually costs more in frustration than a fresh coil costs in dollars.
A quick warm-water rinse can stretch a coil’s life briefly if the wick still looks clean and the device has only been used briefly. That is the upper limit of cleaning a coil. Once flavor turns dull or burnt, the coil has reached the end of its useful life and a swap is the right call.
If coils are being replaced often, the cause is usually one of two upstream habits: chain vaping without giving the wick time to re-saturate, or running heavily sweetened or high-VG liquids that gum up the wick faster than a thinner liquid would. Keeping replacement Atomizers on hand so a fresh coil is always available keeps the device from being stuck mid-day without flavor.
- Most coils last one to three weeks of regular use before flavor starts to slip.
- Burnt or acrid taste on every puff is the most common end-of-life signal.
- Gurgling or popping sounds during firing mean the wick is saturated past its limit.
- Reduced vapor output, even on a full charge and full tank, points to a tired coil.
- Visible dark residue on the wick is a clear sign the coil should be swapped, not deep cleaned.
- A quick warm-water rinse may stretch a coil briefly, but it will not restore factory flavor.
Why Does a Vape Taste Burnt Even After You Just Filled the Tank?
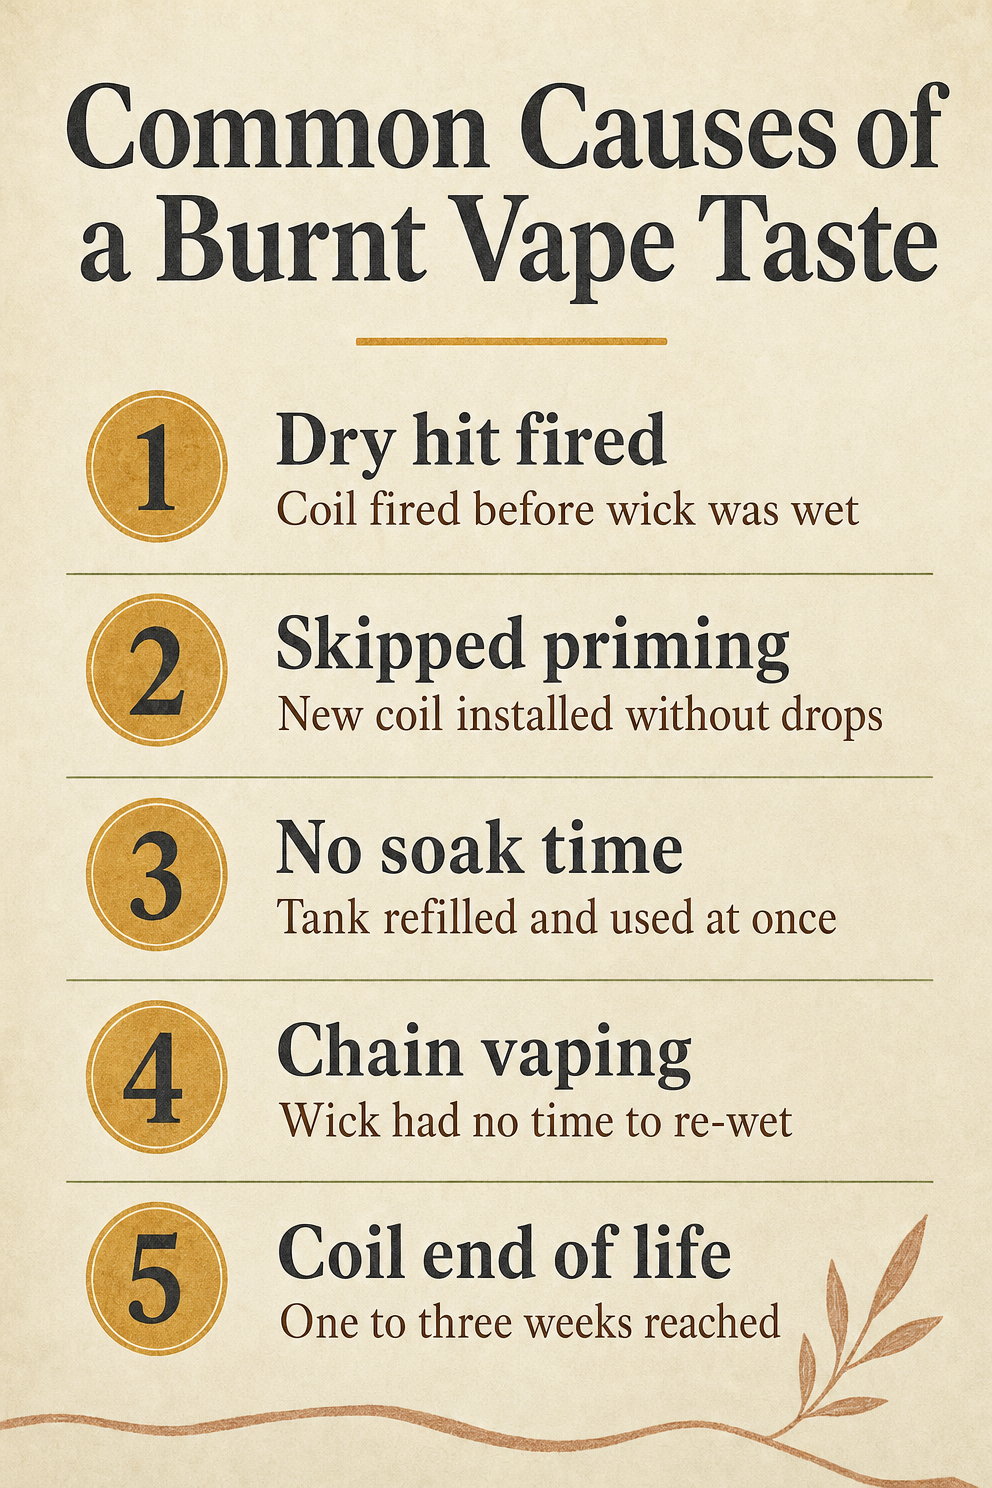
A burnt taste on a freshly filled tank almost always comes down to one of five root causes, and each has a specific fix [3]. Most readers will recognize the cause within a few seconds of thinking about what they did just before the first hit.
A dry hit is the most common cause. The wick was not fully saturated when the device fired, so the coil warmed dry cotton instead of e-liquid. Skipped priming on a new coil produces the same outcome, because a dry wick goes into the tank before any liquid reaches it. Refilling and using the device at once, with no soak time, can leave an older wick only partly saturated, especially if the tank was sitting empty or near empty for a while. Chain vaping fires the coil faster than the wick can re-wet between hits. And a coil that has reached its one-to-three-week end of life will taste burnt on the very first puff of any new fill.
The fix in each case is specific. Saturate the wick fully before firing. Drop a few drops of e-liquid directly on the cotton of any new coil before it goes into the tank. After refilling, give the tank three to five minutes before the first hit. Space out hits long enough for the wick to re-wet between each one. And when a coil is past its lifespan, replace it rather than chasing the burnt taste with another fill.
The same idea of uneven heating comes up in other gear, and the underlying cause is often the same: the heat source ran ahead of the material feeding it. This Why Does My Joint Burn Unevenly and How Do You Fix It? works through the same logic for joints and lays out the equivalent fix on that side of the routine.
- Dry hit fired: the coil warmed up before the wick was fully saturated; wait a few seconds after filling before firing.
- Skipped priming: a new coil was installed dry; drop a few drops on the wick before it goes into the tank.
- No soak time: the tank was refilled and used immediately; let the tank sit three to five minutes after filling.
- Chain vaping: hits came faster than the wick could re-wet; space out hits so the wick catches up.
- Coil end of life: the one-to-three-week mark has been reached; replace the coil rather than chasing flavor with another fill.
How Do You Prevent a Vape Tank From Leaking While Storing the Device?
Most leaks come from how the device is stored between sessions, not from a defect in the tank. A few small habits stop the slow seeps that pool e-liquid in the 510 connection or wet the battery wrapper [3].
Store the device upright whenever possible. Gravity holds liquid against the bottom of the tank where the seals are designed to hold it. Lay the device on its side for long enough and small amounts of liquid work their way past the o-rings. Close the airflow vents when the device goes into a bag or pocket. An open vent under pressure is one of the most reliable ways to push liquid out through the airflow path. For long trips with a full tank, removing the tank from the mod and storing it separately is the surest way to prevent leaks during travel.
Inspect the 510 connection and the battery wrapper before each use. A bent 510 pin leaves gaps where liquid can seep into the mod. A torn battery wrapper exposes the metal casing underneath and is its own battery safety issue. Always charge the battery with the manufacturer-provided charger, and keep the device out of extreme heat or cold, which can warp seals and degrade lithium-ion cells over time.
Carrying a small kit makes the routine easier to keep up. A coil or two, a spare glass tube, a small bottle of isopropyl alcohol, and a few cotton swabs take up almost no room and let the weekly routine happen anywhere. Shop Storage covers the kind of small containers and travel cases that make upright storage and a sealed kit practical on the go.
- Store the device upright whenever possible to keep pressure on the seals where it belongs.
- Close airflow vents when the device goes into a bag, pocket, or carry-on.
- Remove the tank from the mod for long trips with a full tank to avoid pressure-driven leaks.
- Inspect the 510 pin and battery wrapper for damage or corrosion before each use.
- Use only the manufacturer-provided battery charger and keep the device away from extreme heat or cold.
- Carry a small kit with a spare coil, glass, isopropyl alcohol, and cotton swabs for on-the-go cleaning.
Frequently Asked Questions
Is isopropyl alcohol safe to use on a glass vape tank?
Isopropyl alcohol at 91% or higher is widely recommended for tank deep cleans because it dissolves oily residue and evaporates quickly. Always rinse parts thoroughly with warm water after the soak and let every part air dry fully before reassembly so no residue carries into the next fill. The battery, mod, and any electronic component should never be submerged in any cleaning agent.
Can you clean a vape coil with water instead of replacing it?
A quick warm-water rinse can stretch a coil’s life briefly if the wick still looks clean, but deep cleaning rarely brings a coil back to factory flavor. Once a coil tastes burnt, gurgles, or shows dark residue on the wick, replacement is the reliable fix, so carrying a spare coil avoids being stuck mid-day without flavor.
What is priming a vape coil and why does it matter?
Priming means dropping a few drops of e-liquid directly onto the cotton wicking material inside a new coil before it goes into the tank. It saturates the wick so the first hits do not burn dry cotton, which is the most common cause of instant burnt flavor on a brand-new coil. After priming, fill the tank, let it sit for three to five minutes, and the coil is ready to use.
How do you know when a vape coil needs to be replaced?
The four reliable end-of-life signals are a burnt or acrid taste, gurgling or popping sounds, reduced vapor output, and visible dark residue on the wick. Most coils last one to three weeks with regular use. Once any of these signs appear, replacement restores clean flavor faster and more reliably than cleaning.
Does high-VG e-liquid ruin coils faster?
High-VG liquids are thicker than high-PG liquids and build up residue on the coil faster, which shortens coil life and mutes flavor over time. Heavily sweetened flavors like dessert, candy, tobacco, coffee, cinnamon, menthol, melon, and grape deposit sugar-like residue that shortens coil life further. Switching to a less sweet flavor profile or a thinner liquid extends the time between coil swaps.
How should you store a vape tank to avoid leaks?
Store the device upright, close the airflow vents when it goes in a bag or pocket, and remove the tank from the mod for long trips with a full tank. Inspect the 510 connection and battery wrapper for damage or corrosion before each use, and keep the device out of extreme heat or cold, which can warp seals and degrade the battery.
How Long Does It Take to Keep a Vape Tank Tasting Clean?
The whole weekly routine is small. A quick wipe-down after each session, a warm-water rinse once a week, a full isopropyl deep clean every one to two weeks, a fresh coil every one to three weeks, and a few storage habits between sessions. None of those steps take more than a few minutes on their own, and most of them can happen while the tank is drying or while the coil is priming.
The bigger habit is consistency. Tanks that taste clean a month after purchase are tanks that have had a short routine done on time, every time, rather than an occasional long soak after flavor has already slipped. Pick the cadence that matches how heavily the device is used, keep a spare coil and a small cleaning kit on hand, and the rest of the routine takes care of itself.
Sources
- Wikipedia (referencing peer-reviewed sources on e-cigarette engineering): Construction of electronic cigarettes
- Wotofo (vape hardware manufacturer): How to Clean Vape Coil and Tank the Right Way
- Vaporesso (vape hardware manufacturer): How to Clean Vape Coils | Flavor Change Tips & Tricks
- U.S. Centers for Disease Control and Prevention (CDC): About E-Cigarettes (Vapes)
- U.S. Food and Drug Administration (FDA): E-Cigarettes, Vapes, and other Electronic Nicotine Delivery Systems (ENDS)